🐳 Installing Docker on a Raspberry Pi and Building Your First Container
Learn how to install Docker on a headless Raspberry Pi and build your first custom Flask container—perfect for homelab, self-hosted, and dev projects.


If you're new to Docker or setting up your first Raspberry Pi lab, this guide is your next step after getting Raspberry Pi OS Lite up and running. We'll walk through installing Docker the right way, verifying it works, and building your very first container from scratch.
💡 If you need instructions on how to flash the image on your Pi, I show you how to set up a headless Raspberry Pi using Raspberry Pi OS Lite here: 👉 Set Up a Headless Raspberry Pi Like a Pro (macOS Edition)-Here on Bryan's Backbone
This is more than a Hello World — it's the first brick in your custom lab stack.
🛠️ Installing Docker (Official Way)
Before we install Docker, let’s make sure the system is fully updated:
sudo apt update -y && sudo apt upgrade -yThis ensures we’re working with the latest packages and dependencies, which helps avoid weird errors down the line.
Once you are finished with the updates, run Docker's official install script:
curl -fsSL https://get.docker.com -o get-docker.sh
sudo sh get-docker.sh
You can view the official Docker install script on GitHub here if you want to see exactly what it does: https://github.com/docker/docker-install.
After Docker installs, add your user to the Docker group so you can run commands without sudo:
sudo usermod -aG docker $USERThen log out and back in for the group change to take effect:
exitReconnect:
ssh steeletekk@pi-docker.localor ssh <username>@<your IP>

as you can see, all I have right now in my home directory is the Docker script.
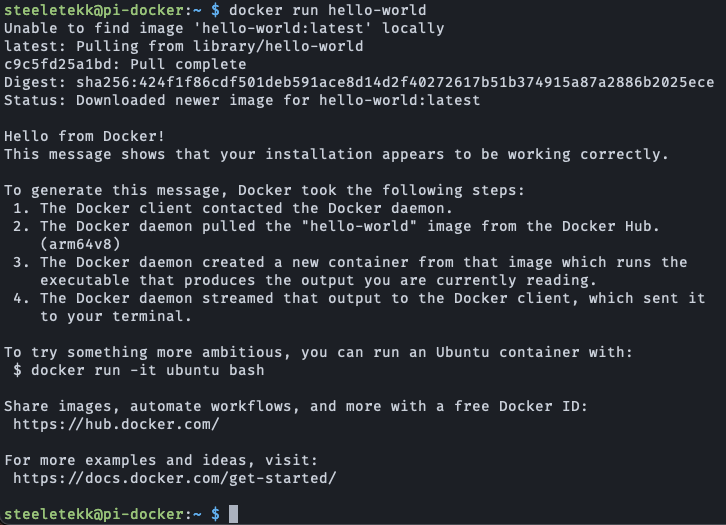
🔧 Test Docker with Hello World
Time to validate your install:
docker run hello-worldYou should see a message from Docker confirming that everything is working. If this runs cleanly, you're ready to go!
🤖 Bonus: Start Docker on Boot
To make sure Docker starts automatically on reboot:
sudo systemctl enable dockerYour Raspberry Pi is now Docker-ready even after a power cycle.
🚀 Build Your First Custom Docker Container (Flask Example)
Let’s learn Docker by doing — we’ll create a custom container using a lightweight Python web app built with Flask.
No advanced Python required. This is about learning how Docker containers are built and run.
🔺 Step 1: Create Your Project Directory
mkdir ~/docker-dns-dashboard
cd ~/docker-dns-dashboard
touch app.py Dockerfile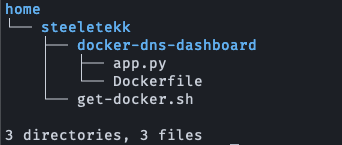
📒 Step 2: Write the Flask App
.app.py
While in the docker-dns-dashboard directory, open the app file using a terminal text editor like vi or nano:
nano app.pyThen copy and paste the following code into the editor:
from flask import Flask
app = Flask(__name__)

@app.route('/')
def home():
    return "Hello from your Pi's first Docker container!"

if __name__ == '__main__':
    app.run(host='0.0.0.0', port=5000)
Press Ctrl + X, then Y, and hit Enter to save and exit.
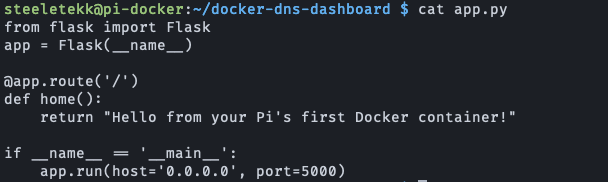
💡 Flask is a lightweight web framework for Python. In this app:We create a basic Flask web server (app = Flask(__name__))Define a single route at/that returns a messageRun the app on all network interfaces (host0.0.0.0) on port 5000
After Step 4: When you visit your Pi’s IP in a browser, this app will respond with: "Hello from your Pi's first Docker container!"
This verifies the container is working correctly, and later we'll build on it to serve real data (like logs or stats). We're using it to test Docker, serve content in your browser, and later display logs from other services.
📦 Step 3: Create the Dockerfile
Dockerfile
FROM python:3.10-slim
WORKDIR /app
COPY app.py .
RUN pip install flask
CMD ["python", "app.py"]
This tells Docker:
- Use a minimal Python image
- Set
/appas the working directory - Copy your Flask app into the container
- Install Flask
- Run the app on container start
Again, use nano to copy/paste the code block above into the Dockerfile file.
nano DockerfilePress Ctrl + X, then Y, and hit Enter to save and exit.

⚡️ Step 4: Build and Run the Container
Still in the docker-dns-dashboard directory
Build the image:
docker build -t flask-dns-dashboard .Run the container:
docker run -d -p 5000:5000 --name dashboard flask-dns-dashboardNow visit in your browser:
http://<your-pi-ip>:5000

🧰 Docker Commands to Know
docker ps                   # List running containers
docker stop dashboard       # Stop the container
docker start dashboard      # Start it again
docker logs dashboard       # View logs
docker exec -it dashboard sh  # Shell into the container
docker rm -f dashboard      # Remove it completel
🚪 Real-World Use Cases
This small Flask app is just the beginning. Think of what you could containerize next:
- A DNS stats dashboard using logs from Pi-hole (even thought Pi-hole already has a dashboard 😆. Maybe via Nebula-Sync)
- A self-hosted API that runs in your homelab
- A Python script that scrapes network stats and displays them via HTML
Docker gives you the power to run repeatable, lightweight services that are easy to deploy and update.
🧠 What I Learned from docker run
After stepping away and coming back to this project, I tried running:
docker run -d...and got an error because I didn’t specify enough arguments. Then I ran:
docker run -d -p 5000:5000 --name dashboard flask-dns-dashboard...and got another error saying the container name was already in use.
Here’s what I learned from that experience — and yes, I understand this may be very elementary, but this is how I learn. Piece-by-Piece. Cmd-by-Cmd. Trying to find those edge cases so they don't catch me later.
🐳 docker run -d
- The
-dflag stands for detached mode, not daemon mode - It tells Docker to run the container in the background and return control to your terminal
- Without it, your terminal stays attached to the container's output
- Runs a container in detached (background) mode
- Requires at least the image name (and often ports, name, etc.)
- Without enough info, Docker doesn’t know what to do and will error out
🐳 docker run -d -p 5000:5000 --name dashboard flask-dns-dashboard
- Tells Docker to run your custom image as a background service
- Maps port 5000 on the host to port 5000 in the container
- Names the container
dashboard— a human-friendly name so you don’t have to reference it by ID flask-dns-dashboardis the name of the image we built earlier
⚠️ Why the error happened
docker: Error response from daemon: Conflict. The container name "/dashboard" is already in use...This happened because the container named dashboard was already running in the background when we ran the command from earlier in the project. Docker doesn’t stop or replace existing containers unless we explicitly tell it to.
“Containers don’t just run and vanish like a script — you need to manage them.”
That brings me to this thought, of 🛑 When Should We Stop a Running Container?
We usually stop a container when:
- 🧪 We’re testing or modifying a container and want to pause it
- 🧹 We’re cleaning up unused containers to free system resources
- 🛠️ We want to rebuild it with new changes (like updated code or environment variables)
- 🧯 We're troubleshooting something and need to restart fresh
We don’t need to stop it if:
- It’s a long-running service (like a dashboard or database)
- It’s working fine and not using unnecessary resources
Remember, containers are meant to be ephemeral — they’re easy to start and stop. Docker gives us control over when they run, and when to shut them down cleanly.
🧰 Helpful Docker Commands:
docker build -t <name> .   # Build a Docker image and tag it
docker run                 # Run a new container
docker ps                  # Shows currently running containers
docker ps -a               # Lists all containers (running and stopped)
docker start dashboard     # Starts an existing container we've already created
docker stop dashboard      # Stops a running container
docker rm dashboard        # Removes a stopped container (helpful for cleanup)
docker rm -f dashboard     # Force removes a container, even if it's still running
🧠 When to Use Each—run or start:
- We use
docker runwhen launching a brand-new container with fresh parameters - We use
docker start/stopwhen we just want to manage a container we've already created
🚪 What's Next?
You now have:
- A headless Raspberry Pi with Docker
- Verified Docker install
- A working custom container you built
Next, we’ll explore:
- Mounting shared folders from the host
- Reading logs from Pi-hole via Nebula Sync
- Using Docker Compose to run multiple containers
👉 Phase 2: Volumes, Logs & Docker Compose on a Pi
Until then — keep building ✌️
— Bryan