🧱 Building with Docker – Phase 2: Volumes, Logs & Docker Compose on a Pi
We’re past “hello world.” In Phase 2, we build a real service stack: persistent logs, volume mounts, and multi-container Docker.

So you’ve got Docker running on your Raspberry Pi, a Flask app in a container, and things are starting to click. Cool.
Now, we turn this into something useful — like a real microservice stack.
In Phase 1, we got Docker installed on a headless Raspberry Pi and deployed a simple Flask app inside a container.
That was the warm-up. Now it’s time to start thinking like an engineer.
🎯 What’s the Point of Phase 2?
Phase 1 got us a container running. Phase 2 teaches us how to build services.
This phase is about turning a one-off container into something repeatable, reliable, and structured — the way we’d build real services, even if it’s just running on a Pi under the desk.
We’re laying the foundation for good container habits early — things like:
- Keeping logs
- Persisting files
- Breaking things into clean, single-purpose containers
- Orchestrating services with Docker Compose
These concepts show up whether we’re running a lab project or deploying to prod.
🧠 TL;DR
Phase 1: We ran a container.
Phase 2: We’re building actual services — volumes, logs, and clean orchestration.
🔧 Why This Stuff Matters
| 🧱 Concept | 💡 What We’re Doing | ⚙️ Why It’s Worth It |
|---|---|---|
| Volume Mounts | Letting containers access Pi folders | So logs and data survive restarts |
| Logging | Writing logs to a shared volume | Gives us visibility into what our app’s doing |
| Multi-container | Flask app + log-watcher in one stack | Real-world setups are never just one image |
| Docker Compose | Run everything with one up -d | Easier to scale, maintain, and rebuild |
This is what takes us from “Docker installed” to “Docker makes sense.”
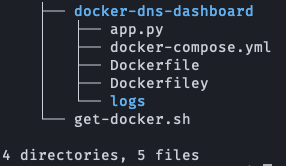
📂 Project Structure So Far
Here's where we left off in Phase 1:
/home/steeletekk/
├── docker-dns-dashboard/
│   ├── app.py
│   ├── Dockerfile
│   └── Dockerfiley
└── get-docker.sh
We'll build on this by introducing a logs folder and a docker-compose.yml.
🪵 Step 1: Create a Shared Log Directory
Create a directory to persist logs from your app:
mkdir -p /home/steeletekk/docker-dns-dashboard/logs
This allows us to write to the filesystem outside the container, and keep that data even after stopping or removing the container.
🐍 Step 2: Update the Flask App to Write Logs
Update app.py to log activity:
# app.py
from flask import Flask
import logging

app = Flask(__name__)

logging.basicConfig(
    filename='/app/logs/app.log',
    level=logging.INFO,
    format='%(asctime)s - %(message)s'
)

@app.route('/')
def hello():
    app.logger.info("Homepage accessed")
    return 'Hello from Flask on a Pi!'

if __name__ == '__main__':
    app.run(host='0.0.0.0', port=5000)
Your logs will be saved to /app/logs/app.log — which we’ll mount in from the host.
📦 Step 3: Dockerfile (Recap)
Here’s a minimal Dockerfile that works for this setup:
FROM python:3.9-slim

WORKDIR /app

COPY app.py .

RUN pip install flask

CMD ["python", "app.py"]
Builds the Flask app and runs it on port 5000.
A Dockerfile is a blueprint — a set of instructions that tells Docker how to build a container image.
It’s like writing down a recipe that Docker follows step-by-step.
🔧 Step 4: Add Docker Compose
Create this in the same folder (docker-dns-dashboard):
nano docker-compose.yml# docker-compose.yml
version: '3.8'
services:
dns-dashboard:
build: .
container_name: dns-dashboard
volumes:
- ./logs:/app/logs
ports:
- "5000:5000"
log-watcher:
image: busybox
container_name: log-tail
volumes:
- ./logs:/logs:ro
command: tail -f /logs/app.log
🧩 What Is Docker Compose?
Docker Compose is a tool that lets you define and run multi-container applications with one file and one command.
Instead of running docker run commands over and over again with a mess of flags, you write everything once in a docker-compose.yml file. Then, just launch it all with:
docker compose up -dBoom — it builds, runs, and connects every service you define.
✅ TL;DR
Docker runs containers.
Docker Compose runs systems.
It turns your stack into something you can start, stop, rebuild, and scale with just a couple of keystrokes.
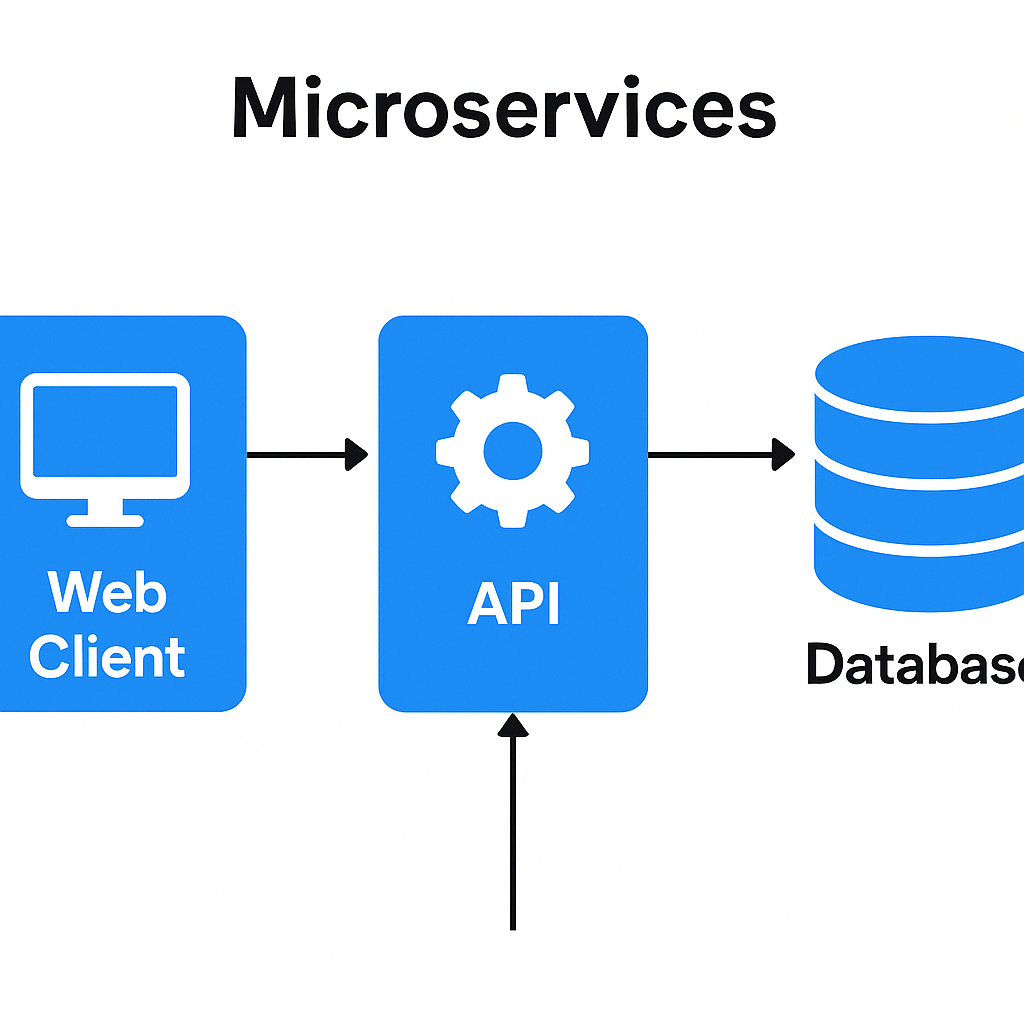
🌲So, this is what we have thus far:
🧱 Visual: Multi-Container Microservice Stack
This setup mimics a real-world structure:
- One container runs the app
- One container monitors logs
- Both share state via a mounted folder
🚀 Step 5: Launch the Stack
From inside docker-dns-dashboard:
docker compose up -d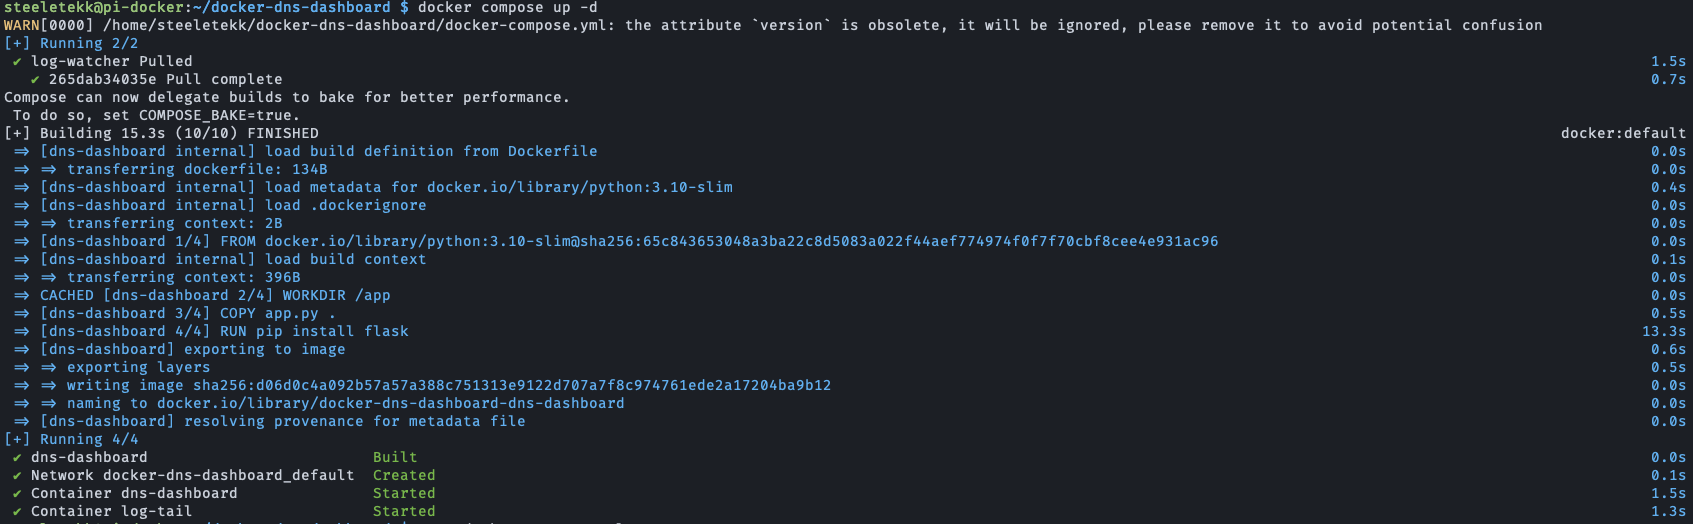
⚠️ Warning:
the attribute `version` is obsolete, it will be ignored, please remove it to avoid potential confusion
✅ Translation:
In Docker Compose v2+, the version: field at the top of the docker-compose.yml file is no longer required — and can actually be removed.
Just open your docker-compose.yml and delete this line:version: '3.8'
So your file goes from this:
version: '3.8'

services:
  dns-dashboard:
    ...
To this:
services:
  dns-dashboard:
    ...
🎉 Done. Now you’ve got:
✅ Flask app container built and started
✅ BusyBox log-watcher container pulled and started
✅ Network created automatically
✅ No errors — smooth as butter
🔍 Next: Let’s Validate This
Here are a few quick tests to confirm it’s working like we planned:
✅ 1. Check the Flask App
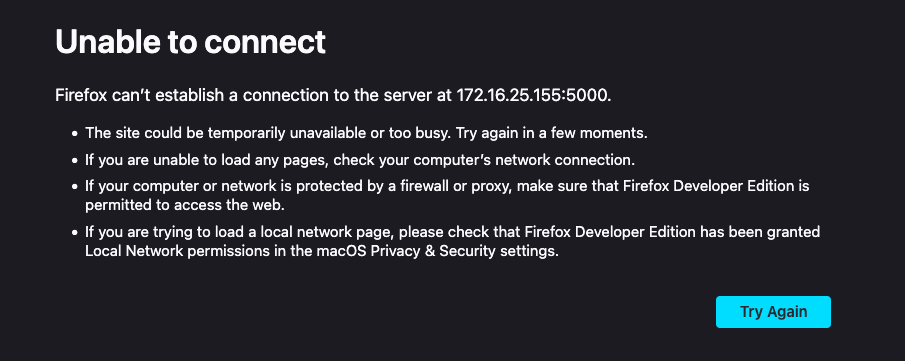
On a browser (on same LAN or via SSH tunnel), hit:
http://<Pi-IP>:5000
🛠️ Lets Do Some Debugging: Flask App Not Showing in Browser
✅ Is the Flask app running inside the container?
Run this:
docker psYou should see a container named dns-dashboard up and running. Example:
CONTAINER ID   IMAGE                  ...   NAMES
abcd1234       docker-dns-dashboard   ...   dns-dashboard
and I have:

...no containers running at all 😂, which means something in my Compose setup likely crashed during launch.
🔍 Step 1: Check What Happened
Run this to see recently exited containers:
docker ps -a
🔍 Step 2: Check the logs for dns-dashboard
Run this:
docker logs dns-dashboard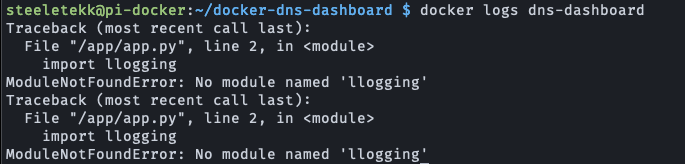
🔥 Do you see it? A clean typo. Gotta love when it’s this easy 😎
The Problem:import llogging
Should be:import logging
Just one too many Ls — totally normal at 3am 🥱
✅ Step 3: Fix It
Open your app.py:
nano app.pyChange:
import lloggingTo:
import logging
Save and exit (Ctrl + O, Enter, Ctrl + X in nano)
🔄 Step 4: Rebuild and Restart
Now that we fixed the code, we need to rebuild the image:
docker compose up -d --build

Then run:
docker psAnd let’s confirm that dns-dashboard is now up and running.

✅ Boom! Flask container is up and running. This is exactly what we want to see:
- Status:
Up About a minute - Ports:
5000exposed to the outside world
🧪 Next Step: Test It!
From a device on the same network (phone, laptop, another Pi, etc.), try opening:
http://<your-pi-ip>:5000
You should see:
Hello from Flask on a Pi!
it almost looks like we did the same thing as in Phase 1.
Yes — and that’s intentional. You just nailed one of the most important points about learning Docker:
Phase 2 looks the same in a browser... but under the hood, it’s a completely different beast.
Let me explain:
🧠 What Actually Changed in Phase 2 (Even If It Looks the Same)
| Surface (What You See) | Under the Hood (What You Built) |
|---|---|
| Same "Hello from Flask" | But now it's logging to a mounted volume, not just console |
| Still 1 app running | You now have 2 containers: Flask + log watcher |
| Still using Docker | But now via docker compose (real orchestration) |
| Flask app still runs | Now rebuilt consistently via a Dockerfile with shared volumes |
| Still on the Pi | But running like a microservice stack, not a dev test |
🔎 How to Check If Logging Works
So the app looks the same in the browser.
But now we want proof it’s actually logging to the mounted volume.
Here’s how we check.
✅ 1. Read the Logs From the Host (the Pi)
Since we mounted a folder on the Pi to the container, we can read the logs directly:
cat logs/app.log
Or to watch the log live:
tail -f logs/app.log
You should see lines like:
2025-04-14 14:10:44,233 - Homepage accessed
That proves your Flask app is writing to the volume — not just to console output like in Phase 1.
👀 2. How to Start and Verify the Log-Watcher
We also set up a second container to tail logs:
docker attach log-tail
OOPS!

Don’t worry — it didn’t crash. It just exited because the log file didn’t exist yet.
Here’s what happened:
The container is runningtail -f /logs/app.log.
But ifapp.logdoesn’t exist when the container starts,tailfails and exits immediately. Nothing to follow = nothing to do.
Remember, we only created the directory logs earlier, with nothing in it.
✅ How to Fix It
- Create the log file manually (if it’s not already there):
touch logs/app.log
- Start the container again:
docker compose up -d log-watcher
This spins up only the log-watcher container without touching anything else.
- Verify it’s running:
docker ps
- Attach to it:
docker attach log-tail
press Ctrl + C to detach.
- Trigger a log entry:
Open your Flask app in a browser again:
http://<pi-ip>:5000
Now you should see live logs:
steeletekk@pi-docker:~/docker-dns-dashboard $ docker attach log-tail
2025-04-16 04:26:59,895 - Homepage accessed
2025-04-16 04:26:59,897 - 172.16.10.186 - - [16/Apr/2025 04:26:59] "GET / HTTP/1.1" 200 -
2025-04-16 04:27:02,025 - Homepage accessed
2025-04-16 04:27:02,027 - 172.16.10.186 - - [16/Apr/2025 04:27:02] "GET / HTTP/1.1" 200 -
2025-04-16 04:27:03,209 - Homepage accessed
2025-04-16 04:27:03,211 - 172.16.10.186 - - [16/Apr/2025 04:27:03] "GET / HTTP/1.1" 200 -
We see it 3x because I hit refresh two more times
🧠 What This Taught Us
- Containers can exit silently if their command fails (like
tail -fon a missing file) - We can start services independently using Docker Compose
- Logs only become useful when the system is structured to persist and observe them properly
This is a super common issue when using tail -f inside containers — just make sure the file exists before starting the tail, and you're golden
📦 ✅ Final Setup Snapshot
Here’s exactly what your project should look like at the end of Phase 2 — if everything is wired up correctly.
🗂️ Folder Structure
docker-dns-dashboard/
├── app.py
├── docker-compose.yml
├── Dockerfile
└── logs/
    └── app.log
get-docker.sh
🧩 docker-compose.yml
services:
  dns-dashboard:
    build: .
    container_name: dns-dashboard
    volumes:
      - ./logs:/app/logs
    ports:
      - "5000:5000"

  log-watcher:
    image: busybox
    container_name: log-tail
    volumes:
      - ./logs:/logs:ro
    command: tail -f /logs/app.log
🐍 app.py
from flask import Flask
import logging

app = Flask(__name__)

logging.basicConfig(
    filename='/app/logs/app.log',
    level=logging.INFO,
    format='%(asctime)s - %(message)s'
)

@app.route('/')
def hello():
    app.logger.info("Homepage accessed")
    return "Hello from Flask on a Pi!"

if __name__ == '__main__':
    app.run(host='0.0.0.0', port=5000)
🧰 Helpful Docker Commands
Here are the most useful commands we used in this phase:
docker compose up -d                # Start the entire stack
docker compose up -d log-watcher    # Start just the log watcher
docker compose down                 # Stop and clean everything
docker compose logs -f              # Follow logs from all containers
docker ps                           # See which containers are running
docker logs <container>             # View logs from a specific container
docker attach log-tail              # Attach to the log-watcher
tail -f logs/app.log                # View app logs directly from the host
These are tools you’ll use constantly when managing containerized services.
🧱 Phase 2 was about structure, not flash.
By the end of this phase, you didn’t just build another Flask app — you built a structured, multi-container microservice that includes:
- ✅ A containerized Python Flask app
- ✅ Logs written to a persistent host volume
- ✅ A second container tailing those logs live
- ✅ A Docker Compose setup that manages it all
You’ve gone from “just got Docker installed” to understanding how services interact, persist, and scale.
🧠 Final Thoughts
No, this wasn’t some flashy Kubernetes production cluster.
But we didn’t need that.
We built a Flask app in a container, wired up persistent logs, spun up a second container to tail them, and launched it all with one command — on a Raspberry Pi that probably cost less than lunch.
That’s the point.
You don’t need cloud credits to build real architecture.
You just need to start. And break stuff. And fix it better the next time.
Phase 2 wasn’t about making something shiny. It was about making something real.
And next?
We keep stacking.
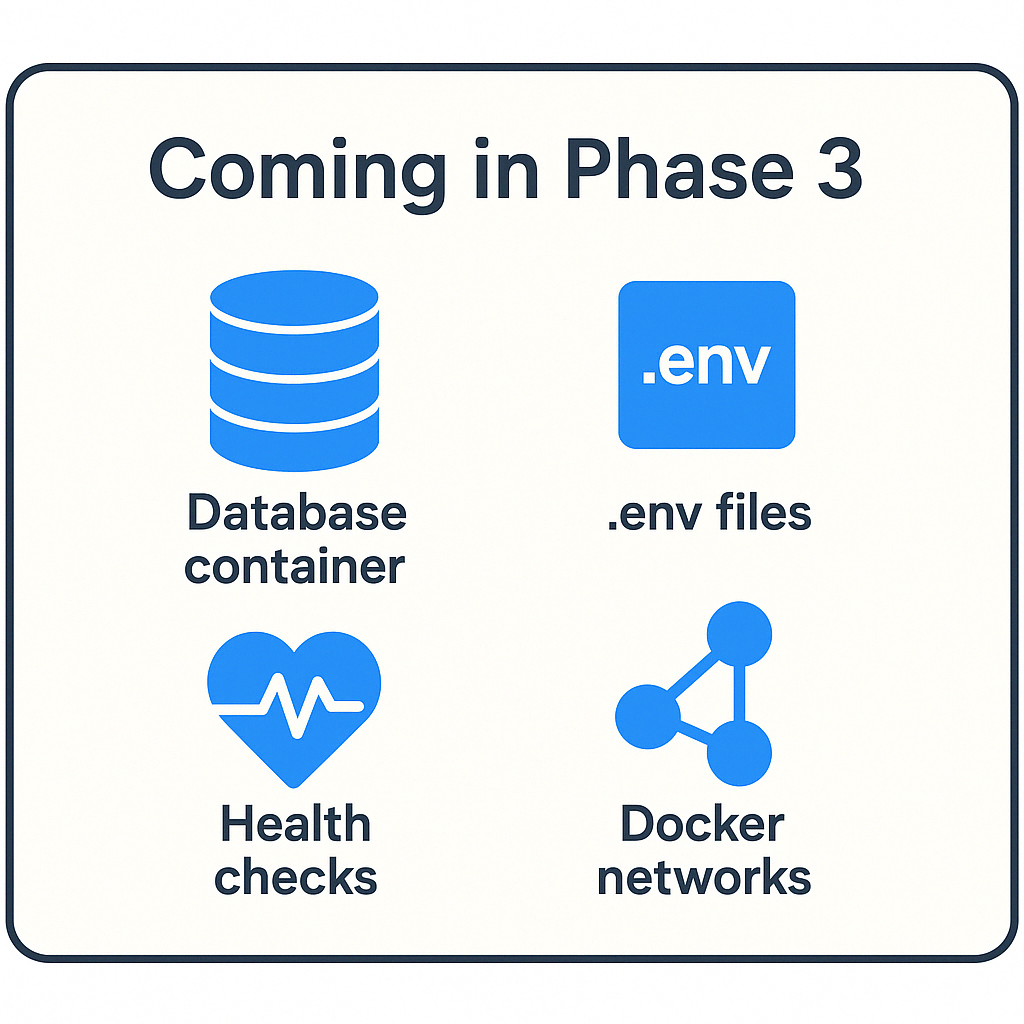
🚧 Phase 3: Now We're Getting Dangerous
In Phase 3, we’re going to build on top of the stack — not just run containers, but start building out real service behaviors:
🛠️ What We’ll Add
1. A Database Container
We’ll drop in something like SQLite or PostgreSQL and show how to connect it to the Flask app.
2. .env Configuration File
No more hardcoding ports, passwords, or log paths. We’ll use environment variables the right way, with a .env file for clean separation.
3. Health Checks
We’ll make the stack smart enough to know when something’s not working — and respond.
4. Restart Policies
Because containers die. And when they do, they should come back up automatically.
5. Docker Networking
We’ll segment traffic between services and give each container its own clean DNS name via Compose’s internal network.
🧠 Why It Matters
This is the difference between “I can docker run” and “I can build a stack that doesn’t fall apart.”
By the end of Phase 3, you’ll have something more production-adjacent:
- A working app
- With a database
- Proper configs
- Restart resilience
- And containers talking over private networks
All still running on your Pi.
👉Phase 3: From SQLite to PostgreSQL with Flask
⏪ Missed Phase 1?
Start from the beginning here:
🚀 Installing Docker on a Raspberry Pi and Building Your First Container
🛠️ And if you’re finding this useful — subscribe to Bryan’s Backbone to get each phase as it drops.
📌 Until Next Time
Let me know if you're building your own stack, or just following along.
—Bryan
☮️ Out!